
If you have a WordPress site, adhering to privacy regulations such as GDPR in Europe, CCPA in the US, and others is imperative. This guide is designed to assist you How to Add a Cookie Consent Banner in WordPress Website. The inclusion of a cookie banner is essential to ensure your website’s compliance with privacy laws.
CookieYes offers one of the most adaptable cookie banners available, granting you the ability to fine-tune your website’s appearance and functionalities. You are also granted the option to choose your cookie banner’s language and personalize elements such as colors, fonts, text, and overall style.
To integrate a cookie banner into your WordPress website, follow these steps:
Install the CookieYes plugin onto your WordPress website.
Step 1. Install the CookieYes plugin and activation.
Step 2. Setup and configure Cookie Banner
Step 1. Install the CookieYes Plugin on WordPress Website
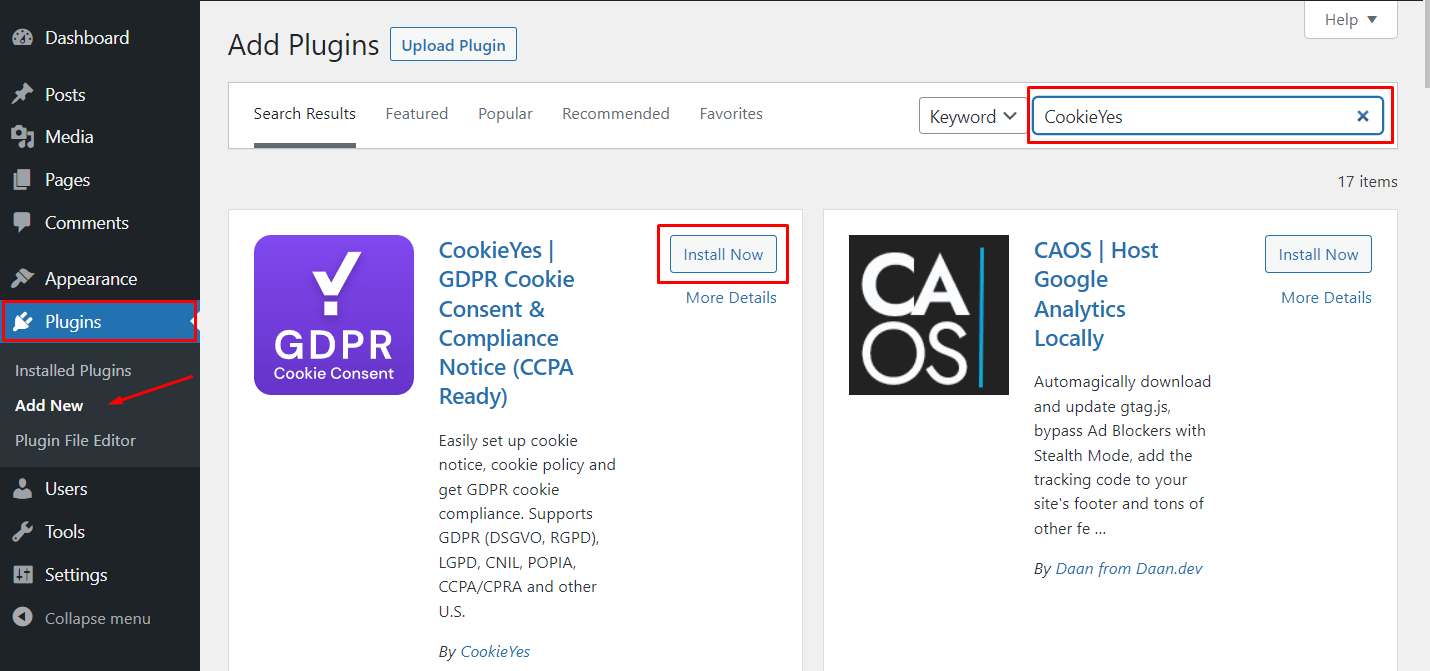
Download the CookieYes Plugin or find it in your WordPress dashboard > Plugins > Add New. Then type “CookieYes” into the search box on the top right and then click Install Now.
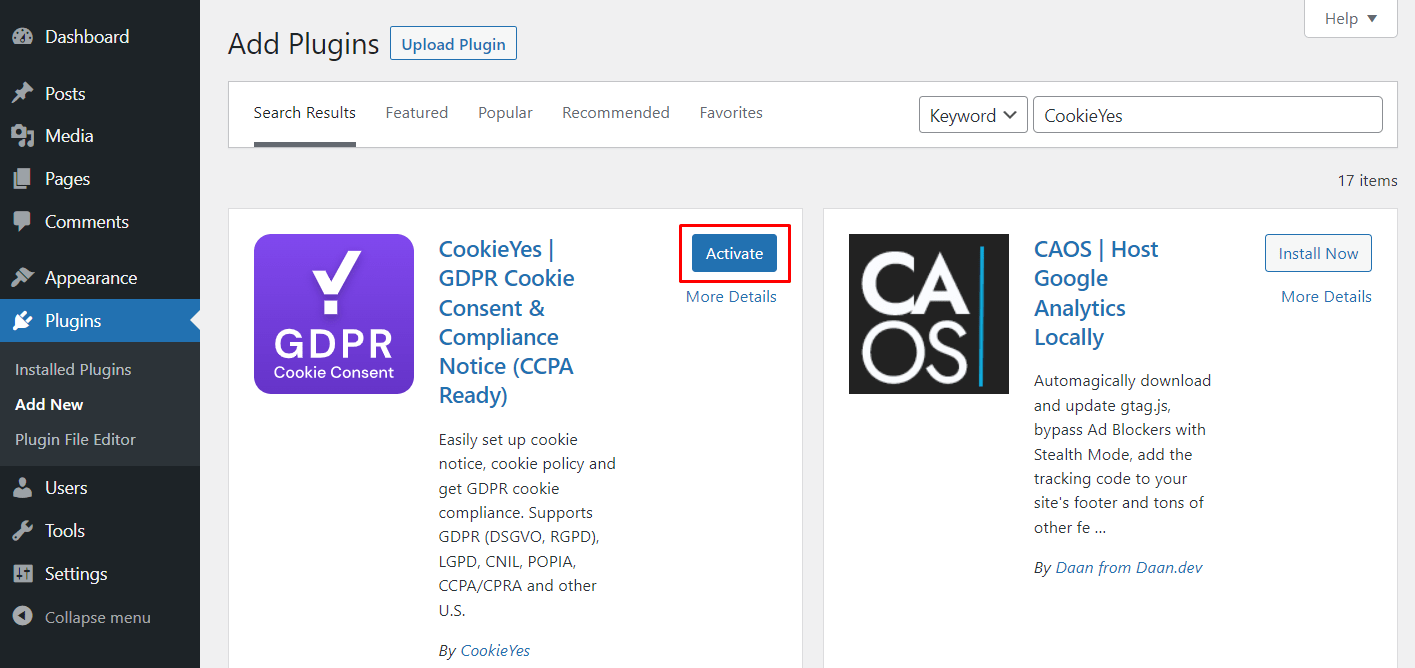
Activate the CookieYes plugin
After installation, you will see the Activate button and click on it.
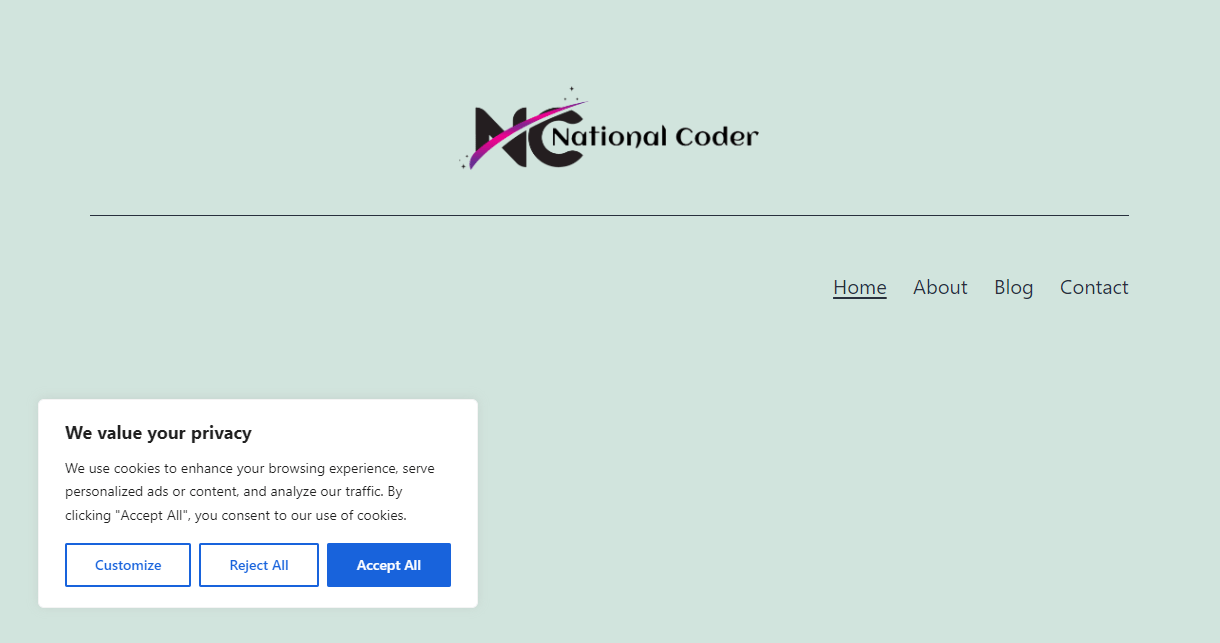
After activation, a Cookie Banner will appear at the footer of your website. If you’re satisfied with the current default design and have no intention of altering the content or layout, there’s no further action required. You can easily keep it as is, without making any changes.
Step 2. Setup and configure Cookie Banner
There are two ways to configure and use cookie banner:
1- Using WordPress plugins only
This method is suitable if you want to manage everything within the WordPress dashboard, although it may limit access to certain features found exclusively in the Cookies web app.
2- Integration via CookieYes web app
If you are comfortable linking to an external service for advanced features and faster updates.
In this article I will show Method 1 using WordPress plugins only. Customizing and configuring the plugin is achievable without establishing a connection to the CookieYes web app. By adhering to this approach, you can still access the core functionality of the plugin.
Cookie Banner Customization
To personalize the key components of the Cookie banner, navigate to your WordPress admin panel and click on CookieYes. Proceed to Dashboard and select Cookie Banner.
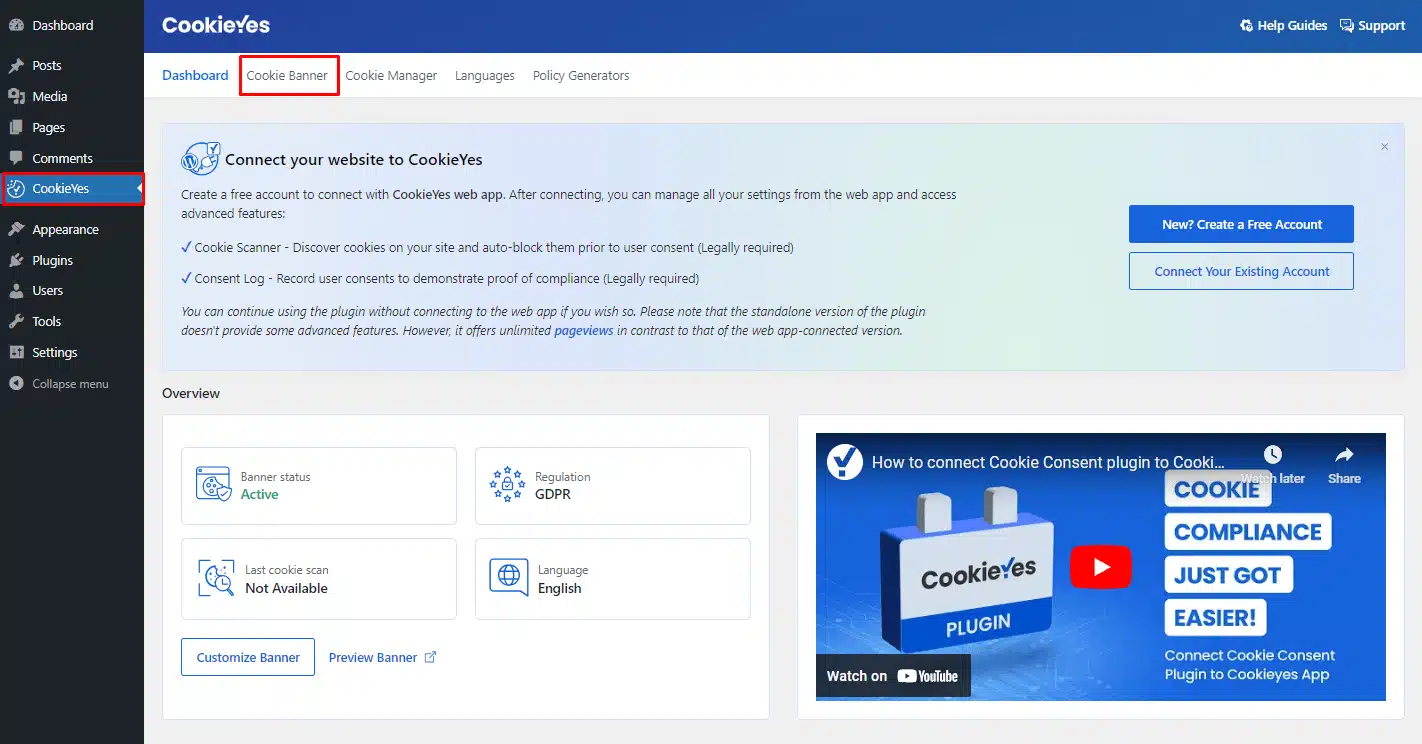
Within this section, you’ll find different tabs that allow you to tailor various aspects of the cookie banner to your preferences.
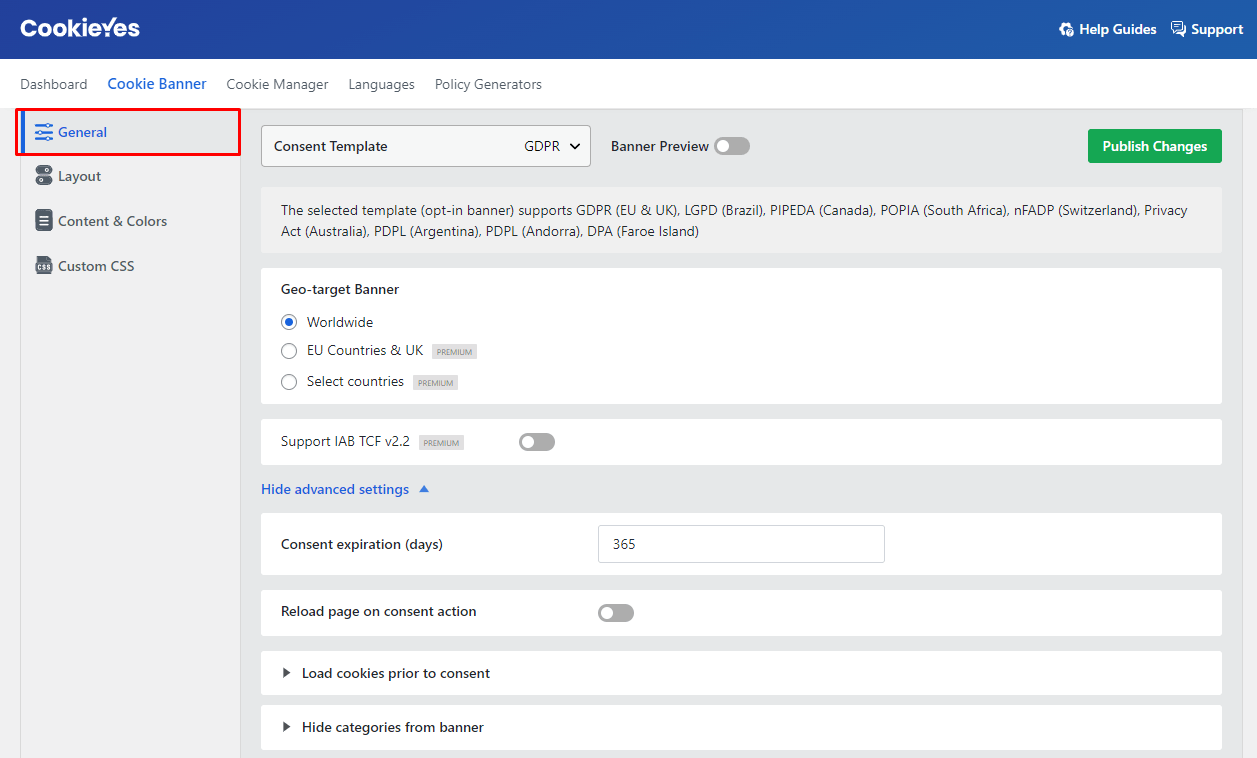
- Consent Template Options:
- GDPR
- US State Laws
- GDPR & US State Laws
Choose “GDPR” to display the GDPR Cookie Consent Notice Bar.
Geo-target Banner: Display the cookie consent notice based on the user’s geographical location.Support IAB TCF v2.2:- Enable: A banner will appear on your website, offering visitors the ability to set detailed advertising tracking preferences. (Exclusive to GDPR Consent Template)
- Disable: This feature will be turned off.
- Consent Template Options:
- Consent Expiration (days): Set the number of days before the user’s Cookie Consent is stored in their browser, prompting the cookie banner to appear again.
- Reload Page on Consent Action:
- Enable: The webpage will refresh after the user’s consent action.
- Disable: The page will not reload.
- Reload Page on Consent Action:
- Load Cookies Prior to Consent: Selecting specific cookie categories will cause cookies in those chosen categories to load before obtaining user consent. This might lead to non-compliance with GDPR.
- Hide Categories from Banner: Choosing particular cookie categories will hide those categories from the cookie banner, potentially leading to non-compliance with GDPR standards.
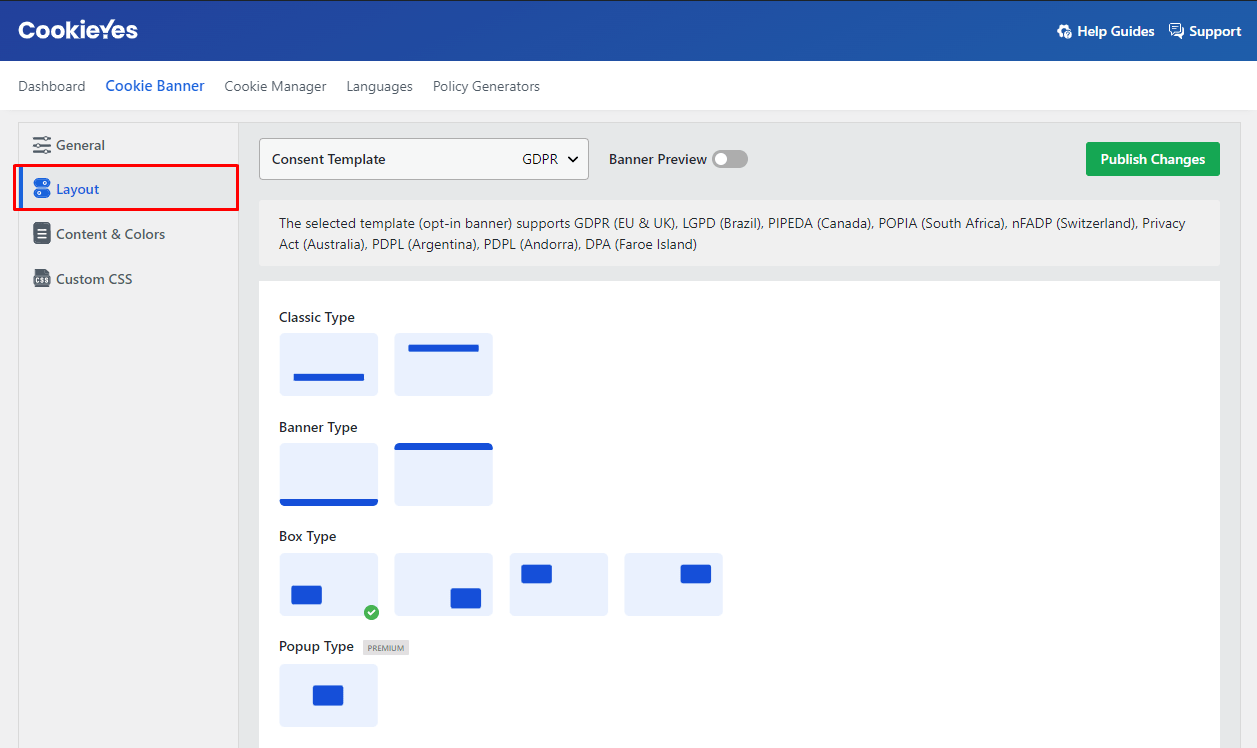
To make the cookie bar look the way you want, choose a layout style that you like from the options available. These styles are already designed for you.
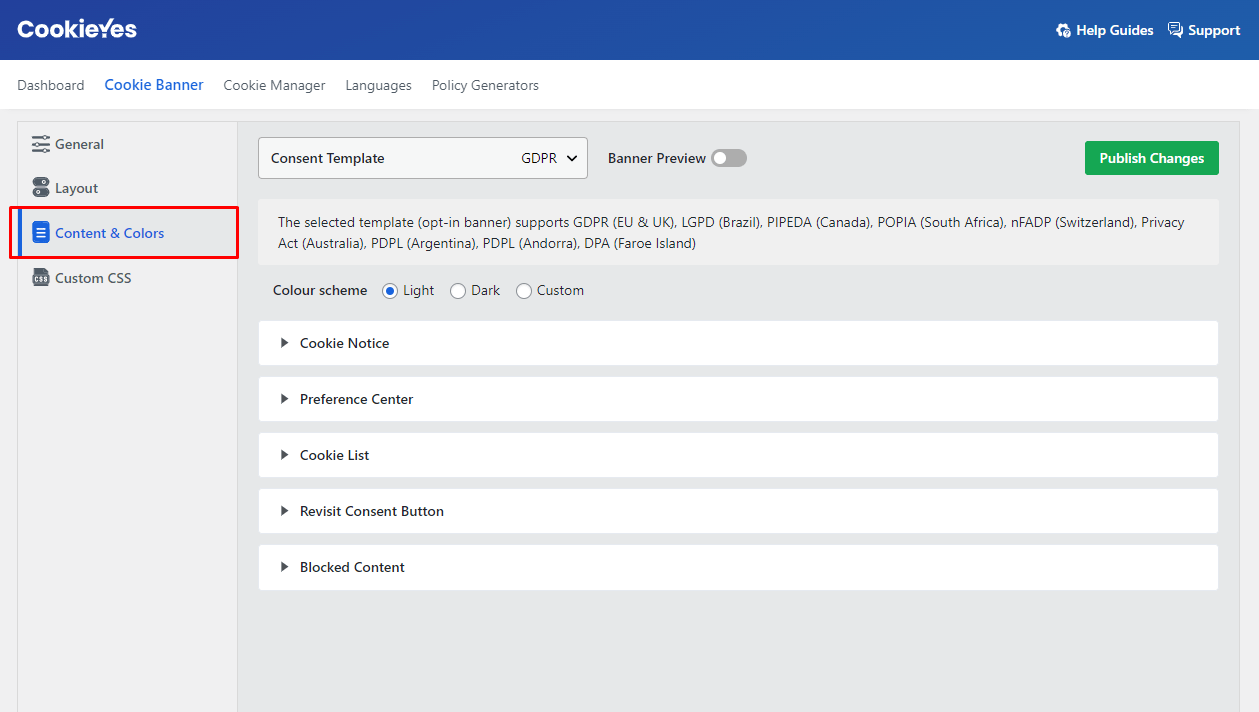
Color Scheme:
- You can select from Light, Dark, or Custom color schemes for the cookie banner.
Cookie Notice:
- Title: Enter the title you want to display on the Cookie bar.
- Message: Type in the message you want to show on the Cookie bar.
- Background: Choose a color from the palette or provide a HEX code for the Cookie Bar’s background.
- Border: Choose a color from the palette or provide a HEX code for the Cookie Bar’s border.
- Title Color: Select a color from the palette or provide a HEX code for the title’s color on the Cookie Bar.
- Message Color: Choose a color from the palette or provide a HEX code for the message’s color on the Cookie Bar.
Accept All Button:
- Label: Enter the name you want to appear on the button.
- Background: Pick a color from the palette or provide a HEX code for the button’s background.
- Border: Select a color from the palette or provide a HEX code for the border of the button.
- Text Color: Choose a color from the palette or provide a HEX code for the text color on the button.
Reject All Button:
- Enable/Disable: You can choose whether to enable or disable the button’s appearance on the cookie bar.
- Label: Specify the name you want to be displayed on the button.
- Background: Choose a color from the palette or provide a HEX code for the button’s background.
- Border: Select a color from the palette or provide a HEX code for the button’s border.
- Text Color: Choose a color from the palette or provide a HEX code for the text color on the button.
Customize Button:
- Enable/Disable: Decide if you want the button to be visible on the cookie bar.
- Label: Provide the name you want to be shown on the button.
- Background: Pick a color from the palette or provide a HEX code for the button’s background.
- Border: Select a color from the palette or provide a HEX code for the button’s border.
- Text Color: Choose a color from the palette or provide a HEX code for the text color on the button.
Read More Link:
- Enable/Disable: You can choose whether the link appears on the cookie bar. This link can lead to your privacy & cookie policy page.
- Label: Specify the text for the Read More link.
- URL: Enter the URL of your cookie policy or privacy policy.
Close [X] Button:
- Enable/Disable: You can choose whether to display a close button on the cookie banner, allowing users to close it without taking any action.
Preference Center:
- Title: Enter the title you want for the Preference Center.
- Privacy Overview: Enter the overview you want to display on the Preference Center.
Save My Preference Button:
- Label: Specify the name you want to appear on the button.
- Background: Choose a color from the palette or provide a HEX code for the button’s background.
- Border: Select a color from the palette or provide a HEX code for the button’s border.
- Text Color: Choose a color from the palette or provide a HEX code for the text color on the button.
Cookie List:
- Show cookie list: You can choose to enable or disable the display of the cookie list in the preference center.
- Cookie label: Specify the term you want to use for ‘cookie’ in the cookie list.
- Duration label: Specify the term you want to use for ‘duration’ in the cookie list.
- Description label: Specify the term you want to use for ‘description’ in the cookie list.
- Always Active label: Specify the term you want to use for ‘Always Active’ in the cookie list.
- No cookies to display label: Specify the term you want to use for ‘No cookies to display’ in the cookie list.
Revisit Consent Button:
- Enable/Disable: Choose whether to enable a small widget that appears at the bottom of the website. This widget allows users to change their cookie preference when revisiting the site.
- Text on hover: Specify the text to display when hovering over the Revisit consent button.
- Position: Choose whether to place the button on the left or right side of the website.
Colors:
- Background: Choose a color from the palette or provide a HEX code for the button’s background.
Blocked Content:
- Label: Enter the text or content you want to show in the placeholder that appears over blocked content like YouTube videos.
Colors:
- Background: Choose a color from the palette or provide a HEX code for the placeholder’s background.
- Border: Select a color from the palette or provide a HEX code for the placeholder’s border.
- Text Color: Choose a color from the palette or provide a HEX code for the text color on the placeholder.